FAQ
Payment for Services
We provide services in advance payment method. After payment money is kept on your personal account. Service fee will be charged from it after server order.
The following payment methods are available at the moment:
- Bank card
- PayPal
Money is instantly transferred to the account.
"The Promised Payment" service is available for our subscribers. It allows to receive services on credit within 5 days, if the account balance is "below zero".
The minimum amount payable is 5 USD.
Fees calculation
Subscription fee is charged off daily, at the beginning of the day, based on 30 days in a month. Service fees and the account balance are always available in the control panel. Server creating and chargeable service connection is possible only when the account balance is more than a zero. Disconnection of any ordered services is possible at any moment via personal account. In the first day of server creation or other service connection the subscription fee will be charged off proportionally to the rest of the day. In case of service deleting or server configuration change, the subscription fee for the rest of the day is not refunded.
Please, be aware that the subscription fee is charged off even when the server power is powered off! To stop the subscription fee accruals it is necessary to delete the server.
When the account balance becomes lower than a zero, all the subscriber's servers are suspended (put on pause). In this case the subscription fee accruals continue. If the account won’t be refilled shortly, the blocked servers (including hard discs data) and the backup copies will be deleted.
Refund policy
You can refund money that is remain unused on your personal account. Subscription fee for provided services can’t be returned.
The refund is made by the email application. Money can be returned only to the same bank card / e-money account from witch it was transferred. Refund fee (to cover transaction costs) is 2 USD per transaction. Account funds received within different promotions, bonuses and other advertising campaigns are not refunded.
Internet Channel
By default, the virtual servers are connected to the shared (one for all) channel to the Internet at the rate of 100 Mb/s. The traffic volume is not limited.
If you are dissatisfied with the ping stability or transfer speed, we recommend you to connect to "Guaranteed Internet channel" in the control panel. Your VPS will be connected to the individual channel with the guaranteed transfer speed.
Private network
Private network allows you to transfer data directly between servers, in the same way as in your company LAN. The private network don't have Internet access.
The service can be connected at the server management page in the control panel. After private network enabling the second network interface will be added for VDS. You have to configure the network parameters manually. Data transfer rate in the private network is 100 Mb/s, the data transfer volume isn't limited.
Hardware Options
We provide virtual servers on two type of storage systems:
- SAS - with professional hard disks HP SAS 15k. To ensure reliable data storage and high speed operation storage system set up in Raid 10 with hot standby disks.
- SSD - also professional HP hard disks, but with SSD technology. Which increases performance more then 2 times. Storage system in Raid 60 with hot standby disks.
You can migrate VPS between different equipment types via personal account, but not often than once a day.
Virtual Server Configuration Change
Server configuration change is possible at any moment. It can be done in the control panel.
Please, be aware that you cannot reduce the size of the hard disc for the virtual server. After you have increased the hard disc size in the control panel, it is necessary to make it available for the operational system. How to do it is written here: Linux and Windows.
Virtual Server Snapshots
"Snapshot" service can be activate in the personal account. Service cost depends on the virtual server disc size. Yet you can make only 1 snapshot for every virtual server. The server can be recover from the snapshot at any moment.
Please, be aware that it is impossible to change server configuration, if the snapshot for it is being stored. For configuration change it is necessary first to delete the snapshot and after that to change configuration.
Backup
VDS backup allows to restore data and server settings at the backup copy creation moment. You may connect the service in the personal account, at the server page, in the "Backup" section. Copies are created automatically every day in the chosen time (±15 minutes). You also choose number of stored copies.
While VDS recover from the backup copy, its configuration (core number, memory, disc) at the moment of copying is also being reset.
Disc Space expansion in OS Linux
You can increase server storage size via personal account. Please pay attention, if you change default disk partitions or use LVM you will have to adjust partitions size manually.
Manual how to change LVM partitions is locates on our website.
When additional storage volume connected to a virtual server, you need to create partitions manually on it.
Disc Space expansion in OS Windows
After increasing the server disc size in the personal account it is necessary to make it available for the operational system.
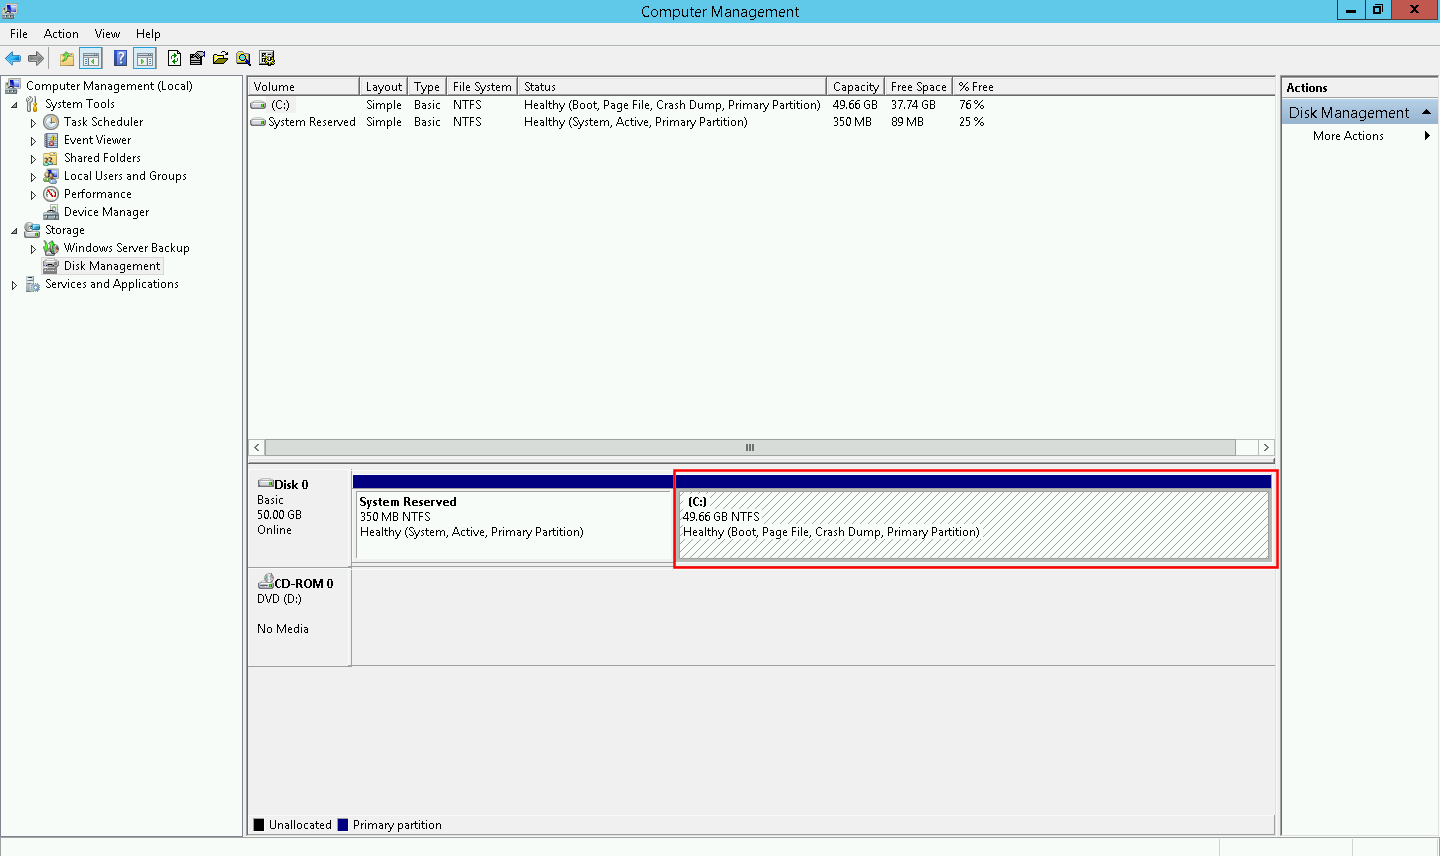
Run Server Manager
Open the "Computer Management" console
Switch to the "Disc Management" item
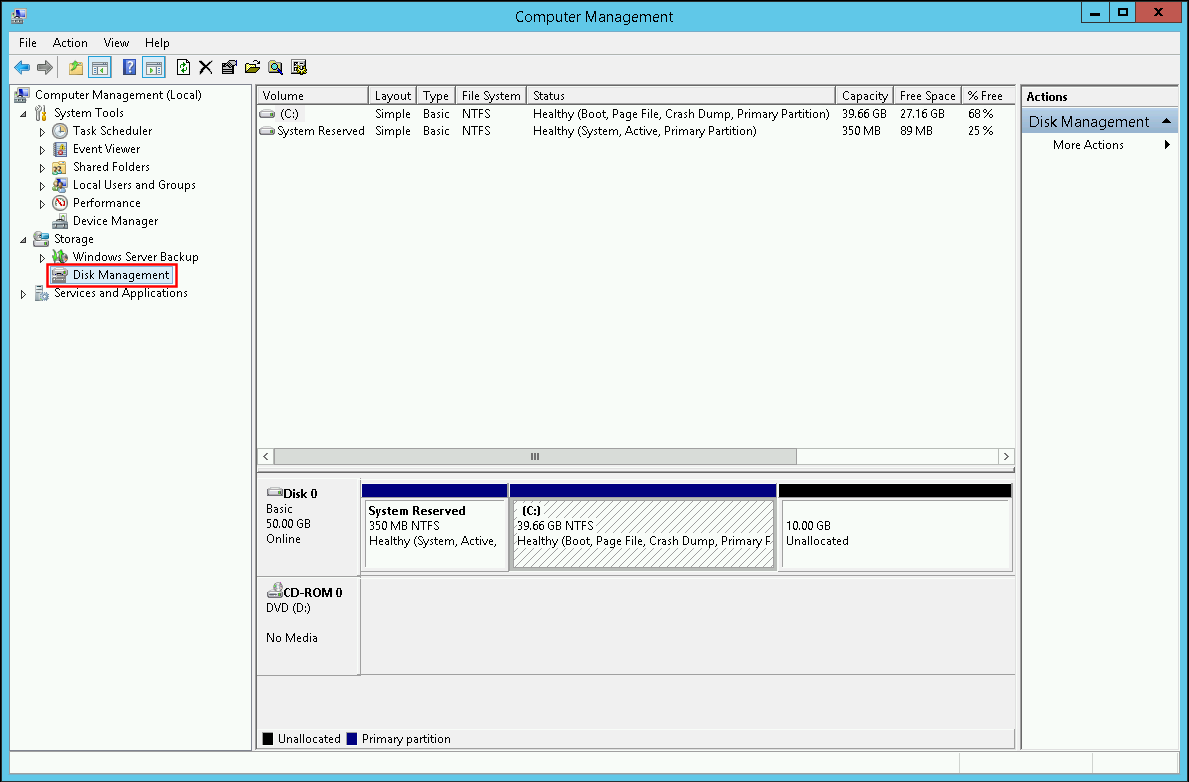
In the discs list find the disc with the unsectioned space. Press the right mouse button at the disc section, where it is necessary to increase the size, and choose the "ExtendVolume..." item
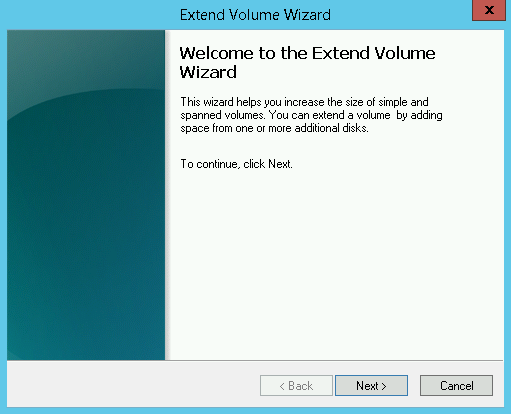
"Extend Volume Wizard" will be opened. Press "Next"
Choose the size of the virgin area for the chosen disc size increase and press "Next"
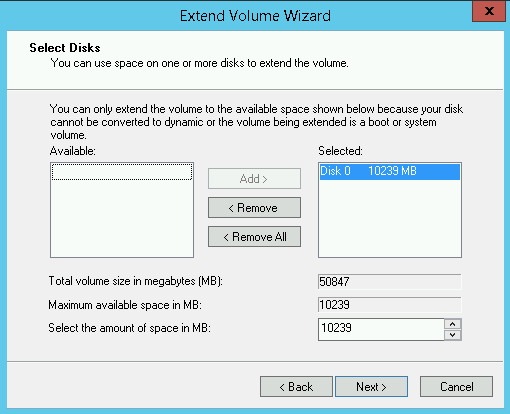
To finish press "Extend Volume Wizard " and press "Finish"
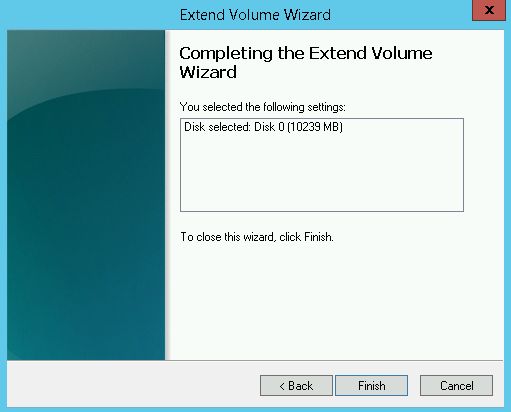
It is ready for service. The disc size is increased and available for use by the system.
Disc Space expansion in OS FreeBSD
After increasing the server disc size in the control panel it is necessary to make it available for the operational system.
Open the terminal under the root user.As an example, the disc space increase from 10GB to 20GB is given.
With the help of camcontrol and part utilities see the full disc size and the sections on it:
root@freebsd_9:~ # camcontrol readcap da0 -h

Device Size: 20 G, Block Length: 512 bytes
root@freebsd_9:~ # gpart show -p

=>     34  20971453   da0  GPT  (10G)

   34     1024  da0p1  freebsd-boot  (512k)

   1058   4194304  da0p2  freebsd-swap  (2.0G)

   4195362  16776125  da0p3  freebsd-zfs  (8G)
Unfortunately, gpart utility will not discover the new disc size without rebooting.Reboot. After rebooting check the state of the sections on the disc:
root@freebsd_9:~ # gpart show -p

=>     34  20971453   da0  GPT  (20G) [CORRUPT]

   34     1024  da0p1  freebsd-boot  (512k)

   1058   4194304  da0p2  freebsd-swap  (2.0G)

   4195362  16776125  da0p3  freebsd-zfs  (8G)
it informs that the disc is damaged. Repair by the command:root@freebsd_9:~ # gpart recover da0
da0 recovered
Check the file system status.root@freebsd_9:~ # zpool status -v
pool: zroot
state: ONLINE
scan: none requested
config:
NAME STATE READ WRITE CKSUM
zroot ONLINE 0 0 0
gptid/d324a6ec-00a3-11e6-8c4d-005056b634ff ONLINE 0 0 0
errors: No known data errors
If the errors are not found, fit the system for the work with the disc sections:root@freebsd_9:~ # sysctl kern.geom.debugflags=16
kern.geom.debugflags: 0 -> 16
Spread division 3 (freebsd-zfs), where we have root ZFS.root@freebsd_9:~ # gpart resize -i 3 da0
da0p3 resized
Check:root@freebsd_9:~ # gpart show -p
=> 34 41942973 da0 GPT (20G)
34 1024 da0p1 freebsd-boot (512k)
1058 4194304 da0p2 freebsd-swap (2.0G)
4195362 37747645 da0p3 freebsd-zfs (18G)
root@freebsd_9:~ # sysctl kern.geom.debugflags=0

kern.geom.debugflags: 16 -> 0
Allow ZFS auto-spreading, it is switched off by default:root@freebsd_9:~ # zpool set autoexpand=on zroot
Find the guid value for partition where zroot is located:root@freebsd_9:~ # zdb
zroot:
version: 5000
name: 'zroot'
state: 0
txg: 39
pool_guid: 3841104802294009910
hostname: 'freebsd_9.3'
vdev_children: 1
vdev_tree:
type: 'root'
id: 0
guid: 3841104802294009910
children[0]:
type: 'disk'
id: 0
guid: 3061978126472363673
path: '/dev/gptid/d324a6ec-00a3-11e6-8c4d-005056b634ff'
phys_path: '/dev/gptid/d324a6ec-00a3-11e6-8c4d-005056b634ff'
whole_disk: 1
metaslab_array: 34
metaslab_shift: 26
ashift: 12
asize: 8584429568
is_log: 0
create_txg: 4
features_for_read:
com.delphix:hole_birth
Get guid: 3061978126472363673Give a command to ZFS to use all the available space — key -e, specifying the above found guid:
root@freebsd_9:~ # zpool online -e zroot 3061978126472363673
Check the result:root@freebsd_9:~ # zpool list zroot
NAME SIZE ALLOC FREE CAP DEDUP HEALTH ALTROOT
zroot 17.9G 1.81G 16.1G 10% 1.00x ONLINE -
It is ready for service.
How to Connect to VDS with Linux?
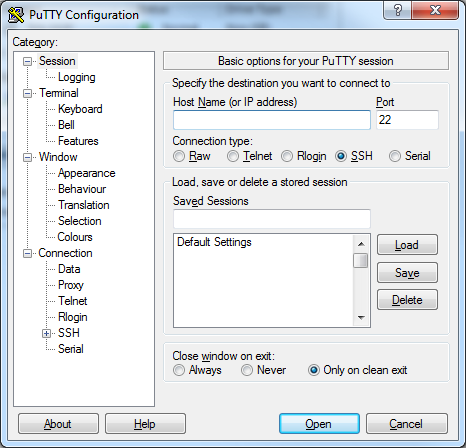
For the remote control of VDS based on the OS Linux it is necessary to use any SSH client, for example, PuTTY. Download the application from the official site putty.org.
Run the PuTTY application, enter your VDS IP address in the appeared window in the field "Host Name (or IP address)", press the button "Open"
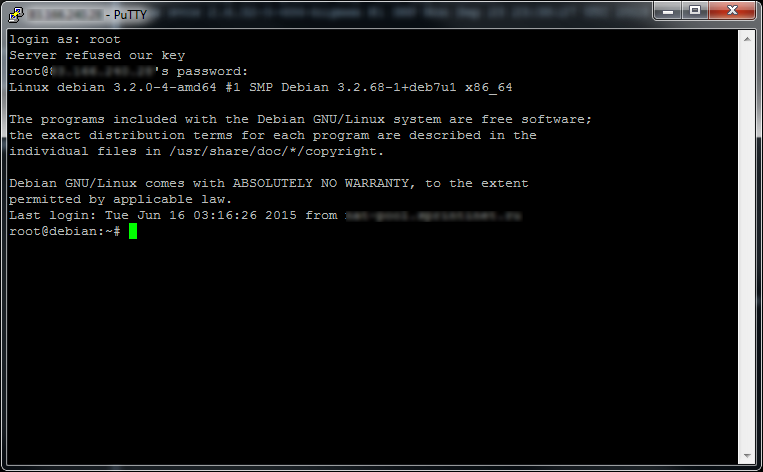
After that your VDS SSH console will be opened, there it is necessary to enter the user name and the password:
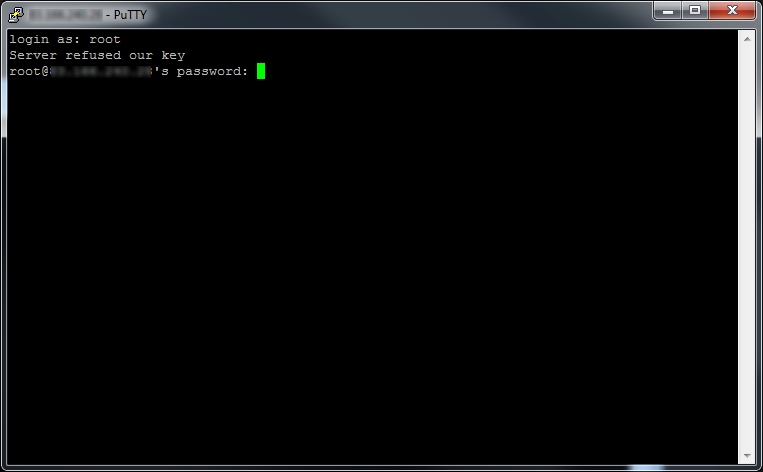
If the authorization is successful, you will acquire your VDS control console:
How to Connect to VDS with Windows?
In the control panel, at the server page press the link "Download RDP File".
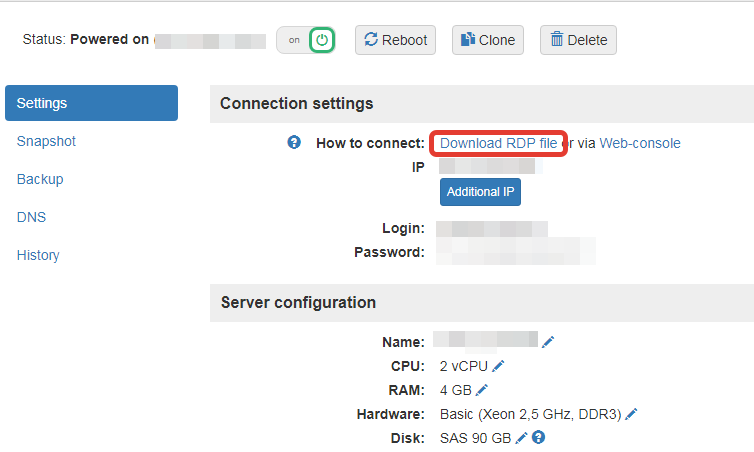
Run the downloaded file. In the appeared window note the password specified at the server page in the control panel:
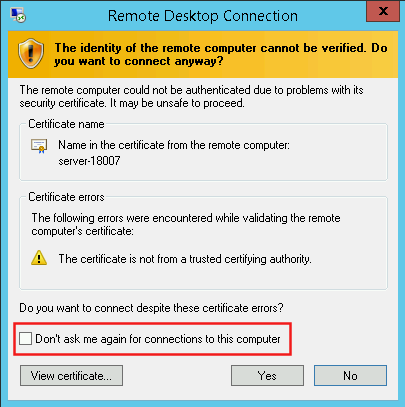
With the first connection, the notification about the certificate authentication check impossibility will be opened. In order that it is not further show, put a mark in the field "Don’t ask me again for connections to this computer". And press the button "Yes".
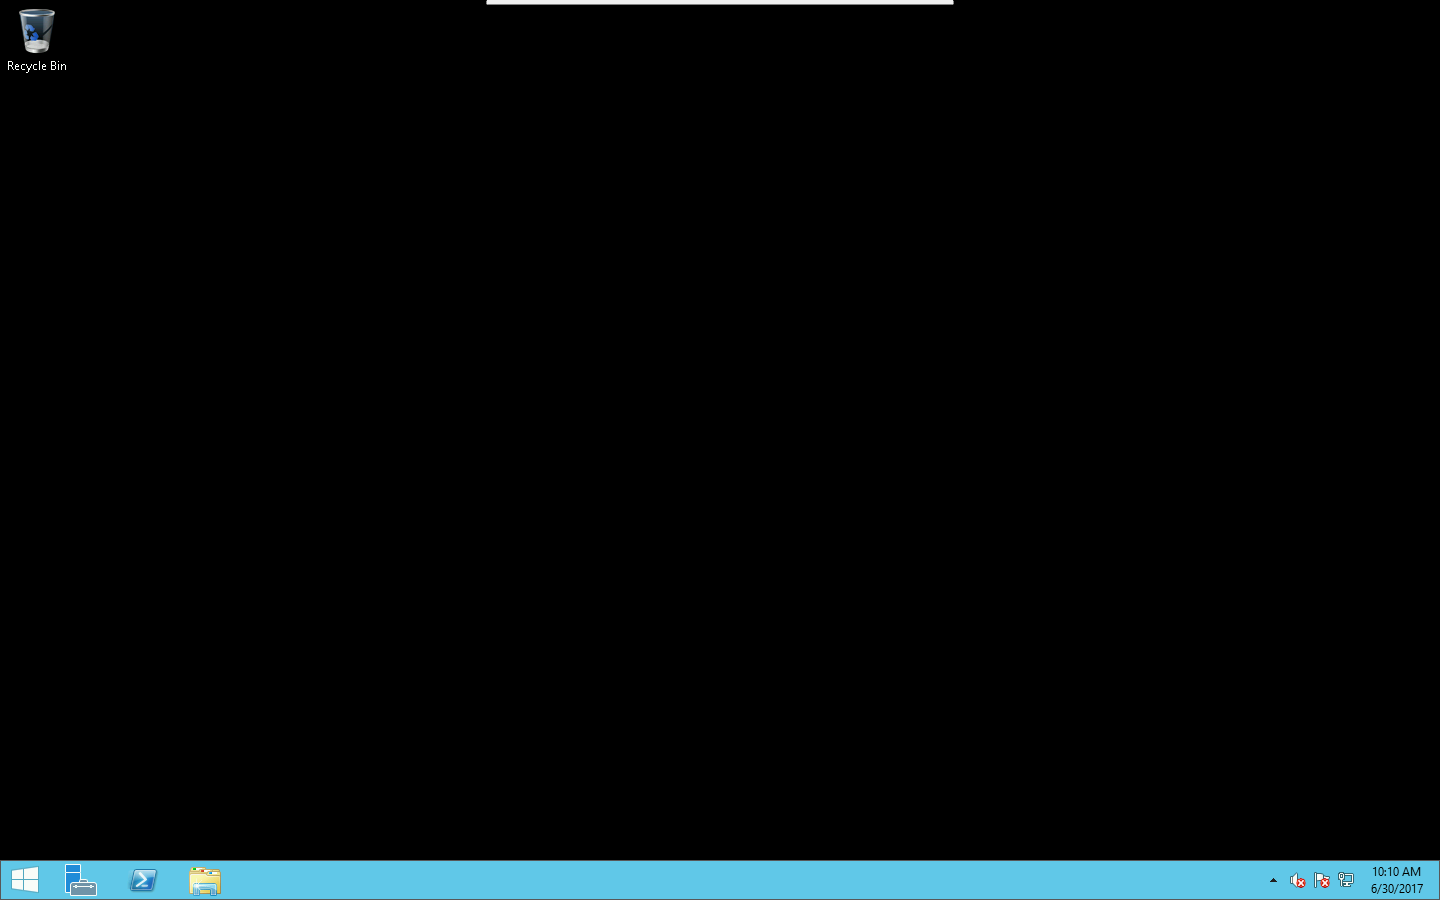
As a result, the remote desktop will be opened:
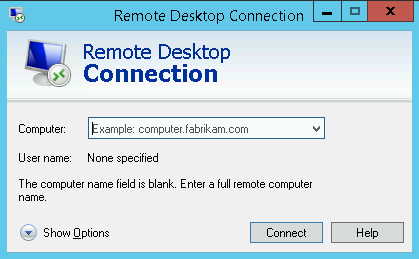
Also you can produce RDP file individually. To do this run the application "Remote Desktop Connection" at your computer with Windows, enter your VDS IP address in the field "Computer" in the appeared window, press the button "Connect"..
Additional IP
For every virtual server one public static IP address is provided. You can connect an additional IP address individually in the control panel, the cost is 2,5 USD/month.
ISPmanager Control Panel
We do not offer the ISPmanager license rental. You can acquire the license at the ISPsystem site or at any reseller's site.
We offer an opportunity to order the virtual server with the already pre-installed ISPmanager panel. After server creation the ISPmanager control panel will be available at the following URL address: https://
Also you can install the ISPmanager panel individually. The detailed information on installation and setting up is here.
How to Switch off the Upgraded Security Configuration of Internet Explorer in Windows Server 2012
When Internet Explorer enhanced security Configuration (IE ESC) is switched on, the user sees pop-up windows with the request to add every new URL to the IE trusted area. If you are ready to raise the server safety level individually, you may switch off this function.
Method 1: disconnection through the Explorer
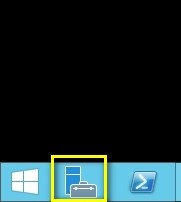
1. Run Server Manager.
2. Choose "Local Server" ( where it is necessary to switch off the Internet Explorer enhanced security Configuration):
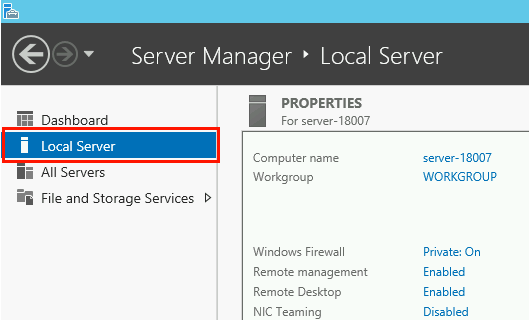
3. In the right section of the window Server Manager you will see Internet Explorer Enhanced Security Configuration ("On" by default):

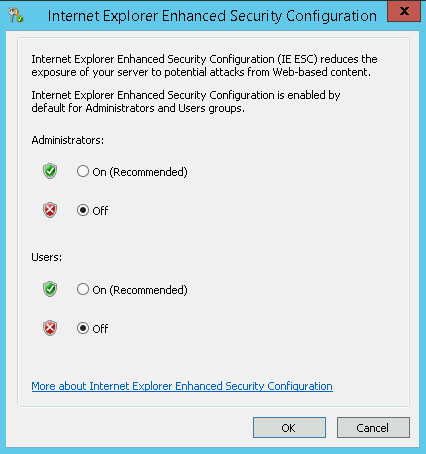
4. Click "On", then choose the option of Internet Explorer Enhanced Security Configuration: configuration switching off only for the Administrator's account, or configuration switching off for all the rest users. The administrator's local account use is the source of the additional security threat, also it does not often give the required result in tests, when the administrator has authorization and the average user does not have one. So it is more preferable, while testing, to use the account without administrator's rights – and in this case to switch off the Configuration only for the given user.
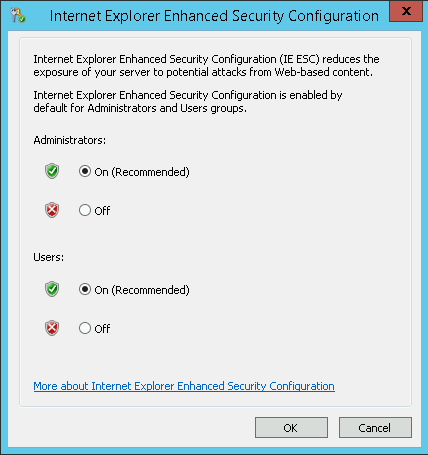
5. The Internet Explorer Enhanced Security Configuration full switching off is shown below. After selecting, press "ОК:
6. Having returned to Server Manager, renew it with the help of F5 key, after that you will see that the setting has changed to the "Off" mode

7. It is ready for service. Open the Internet Explorer browser window and check the access for any site.
Method 2. Windows PowerShell
Open Windows PowerShell
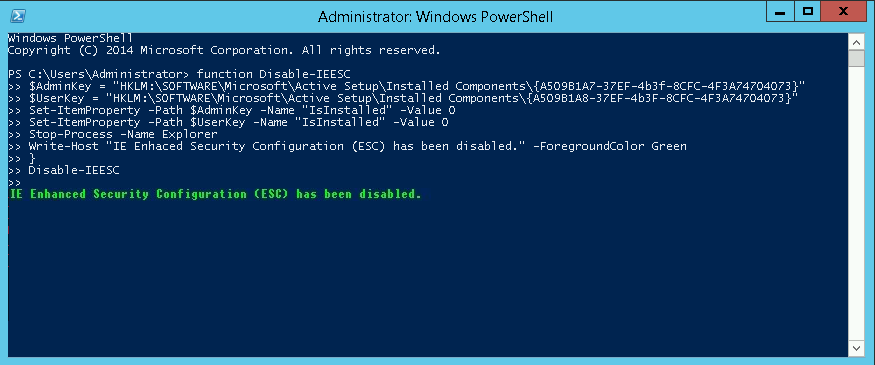
Insert the following code into the text document with suffix ps1: Disable-IEESC.ps1. It will switch off the Internet Explorer Enhanced Security Configuration both for the user, and for the administrator:
function Disable-IEESC {
	$AdminKey = "HKLM:\SOFTWARE\Microsoft\Active Setup\Installed Components\{A509B1A7-37EF-4b3f-8CFC-4F3A74704073}"
	$UserKey = "HKLM:\SOFTWARE\Microsoft\Active Setup\Installed Components\{A509B1A8-37EF-4b3f-8CFC-4F3A74704073}"
	Set-ItemProperty -Path $AdminKey -Name "IsInstalled" -Value 0
	Set-ItemProperty -Path $UserKey -Name "IsInstalled" -Value 0
	Stop-Process -Name Explorer
	Write-Host "IE Enhanced Security Configuration (ESC) has been disabled." -ForegroundColor Green
}
Disable-IEESC
If you insert the script directly into the PowerShell window, press Enter twice after insertion. PowerShell run on behalf of the Administrator:
It is ready for service!
The Referral Program Rules
Description of our referral program locates on page https://neoserver.site/referral and in personal account “Refferal program” section.
- The advertisement shall correspond to the USA laws and our service rules.
- It’s forbidden to provide any information about the referral programme, including promo-code and referral links with the help of spam.
- It’s forbidden to generate fictitious traffic to the site, with the help of doorway pages, artificial click-fraud systems, robots and pay per click earning systems.
- Do not place advertisment in search engine services containing name NeoServer and its derivatives of any languages.
- The promo-codes and the referral links exchange between the program participants is forbidden.
- It’s forbidden to create accounts for personal usage (multiple accounts controlled by one person) within referral program.
- It’s forbidden to advertise NeoServer servers for illegal activities and activities prohibited by NeoServer rules.
- It’s forbidden to pretend to be a NeoServer company. It should be clear from ads that you are reseller.
- It’s forbidden to create pages with phrases “promotion code NeoServer”, “discounts NeoServer” and derivatives from them.
We reserve the right to refuse program participants in bonuses payment, in case of violation of the aforesaid rules or our terms of service.
Uninterrupted Operation Warranty
We do not only promise the virtual server uninterrupted operation, but also are ready to give a financial guarantee!
With the "Extended Warranty" we guarantee the virtual server Uptime to be 99.99%. In case of VDS unavailability for more than 4.5 minutes a month, we will compensate downtime in 10 times rate.
The basic warranty included on all our tariffs covers Uptime 99.8%. In case of downtime for more than 86 minutes a month, we will refund the subscription fee for this time.
The cost of the service "Extended Warranty" is 15% of the subscription fee for every virtual server, but no less than 5 USD/month. The service can be connected in the personal account at the server management page.
DNS records configuration
Our DNS servers:
- ns.neoserver.site
- ns2.neoserver.site
Important: our DNS servers will start to respond on request about domains only after indicating a domain name on it. To do it you have to specify our DNS servers in your domain name register panel.
DNS setting updated 1 once an hour.
DNS system update all over the Internet can took from 1 to 24 hours.
How to manage DNS records:
А– Specify host IP in the field «Value». E.g. «1.1.1.1.»
Specify subdomain name in the field «Subdomain». E.g. «subdomain».
ААА – we don’t support this type of records.
MX – Specify mail server name in filed «Value». E.g. «mail.example.com».
In the field «Priority» should be specified a number from 0 to 65535. Pay attention that «0» - is the highest priority. For example «10». it’s generally accepted for the first mail server to set priority to «10».
In the field «Subdomain» should be specified a subdomain name. E.g. «subdomain».
TXT – In the the field «Text» should be specified an any text. Max length 255 symbols.
Remark:
It’s no need to put inverted commas (“” symbol) in the begging and at the end of sting. Inverted commas will be added automatically. If you use inverted commas inside of string they will be shielded automatically.
SRV – contains next fields :
- _Service._Proto.Name. For example: _jabber._tcp.jabber, где:
- Service: service name (for example: ldap, kerberos, gc and others).
- Proto: connection protocol to this service (for example: tcp, udp).
- Name: имя домена, в котором размещена данная служба.
- Priority – as for MX record it’s number from 0 to 65535. For example «10». «0» - is the highest priority.
- Weight – it’s an integer number. For example «2».
- Port – service port number on this server. For example «22».
- Destination – domain name of server that support this service. For example «service.example.com»
In the field «Subdomain» should be specified a subdomain name. For example «subdomain».
CNAME (canonical name)– it’s used for redirecting on another domain name. For example, server name changed from example.com on new.com. In this case in CNAME field “Alias” you should specify “example.com” and in filed “canonical name” specify “new.com”. After this all request on example.com will be automatically redirected to new.com.
TTL (zone setting field) – default value is: “86400” – 1 day. TTL value can’t be less than 5 minutes.
Value could be specified in different ways: in weeks, days, hours, minutes or second. To do it you should use appropriate symbols: w – weeks, d – days, h – hours, m – minutes, s – seconds.
Supported formats: XXw – XX weeks, XXd – XX days, XXh – XX hours, XXm – XX minutes, XXs – seconds, where XX – is a number.
For example:
«1890» — 1890 seconds.
«2d5h» — 2 days and 5 hours.
«3h30s» — 3 hours and 30 seconds.
Adding IP restrictions to your account
To add new layer of security to your account, you can add restrictions so only select IP-addresses have access. If account was blocked under access policy, your VPS are works as usual, but web-interface options will be limited.
Dynamic vs. static IPs
Dynamic IP-addresses are the most common and change periodically, which could lock you out of your account. Static IP-addresses remain the same and are typically sold by Internet Service Providers (ISP) for a premium price.
If you are on a home network and are not sure if you have a static IP address, you can ask your provider about it or add subnet mask e.g. 0.0.0.* where * allows any digits.
How to add IP restrictions to your account:
- Log in to your account. Select "Profile" at the right corner of the top line menu.
- Be sure, that your really location fields are not empty. You need it to recovery access if your IP will be changed.
- Check on "Mail agreement". The link for unblock will be sent at verified account email.
- Specify up to 3 IP-addresses (or networks) may access your account web-interface. It can be your office, workplace or subnetwork.
If your workplace address was changed or you forget about this restriction and account was blocked, you can recovery access.
After reply control questions, the instructions and reset link will be sent to your registered email.