SMTP server on Windows: setting up and installation
This guide will cover the process of installing and configuring an smtp server on virual servers running Windows operating systems.
What it is
An SMTP server is used to send e-mail for exchange on the Internet and within a local network. Can be used to send system messages and log files.
Installation
First you need to add the missing features.
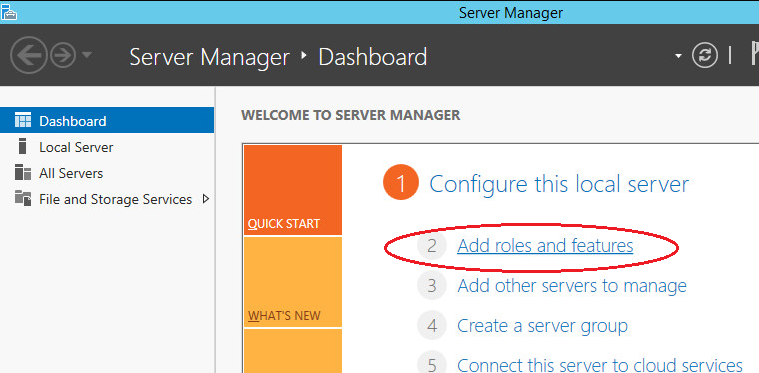
Select “Role-based or feature-based installation” and click “Next”.
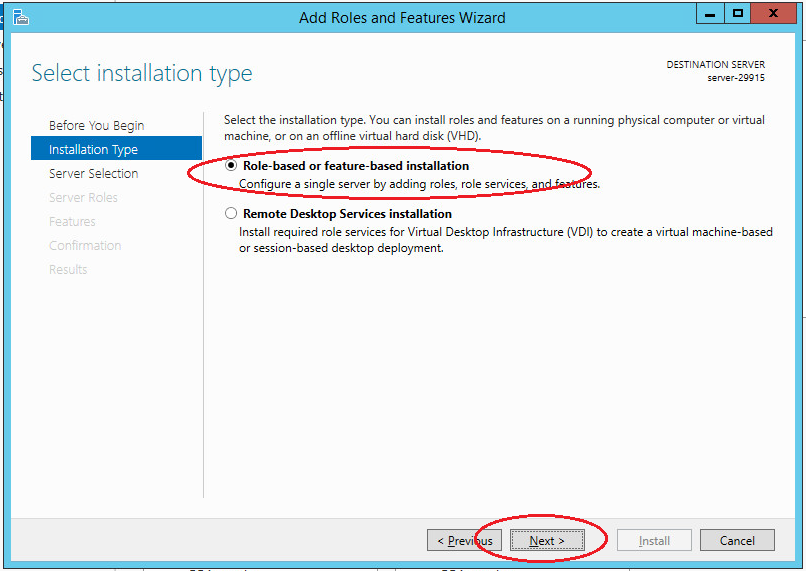
Choose needed server from the pool.
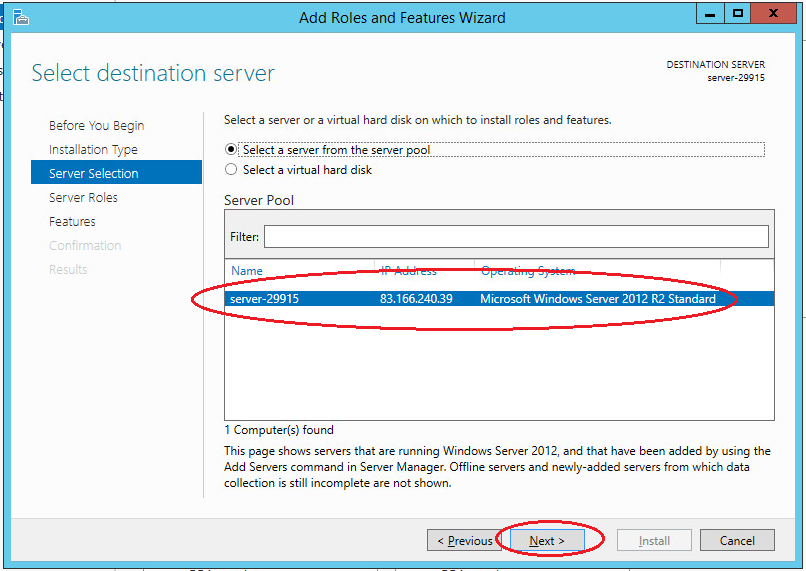
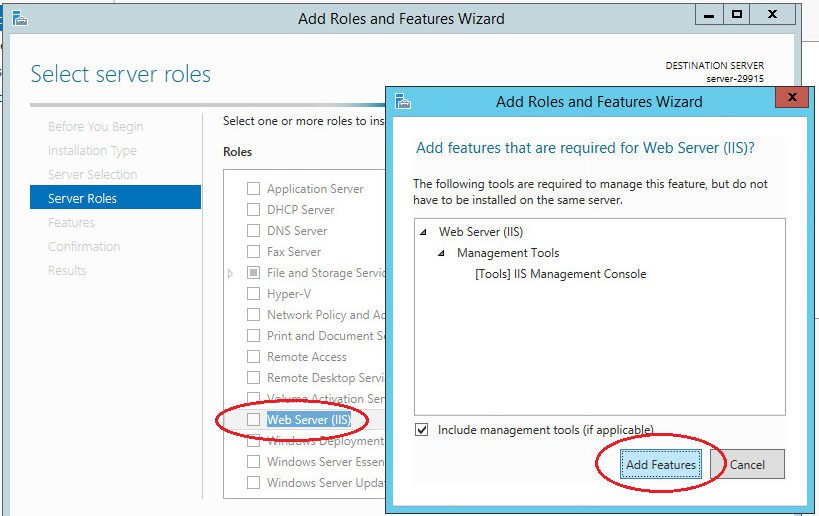
In the next step, select the “Web Server (IIS)” role. In the window that opens, click “Add features”. Web server (IIS) contains consoles to manage the SMTP service.
Next in the list of features, select “SMTP-server”. In the window that opens, click “Add features”.
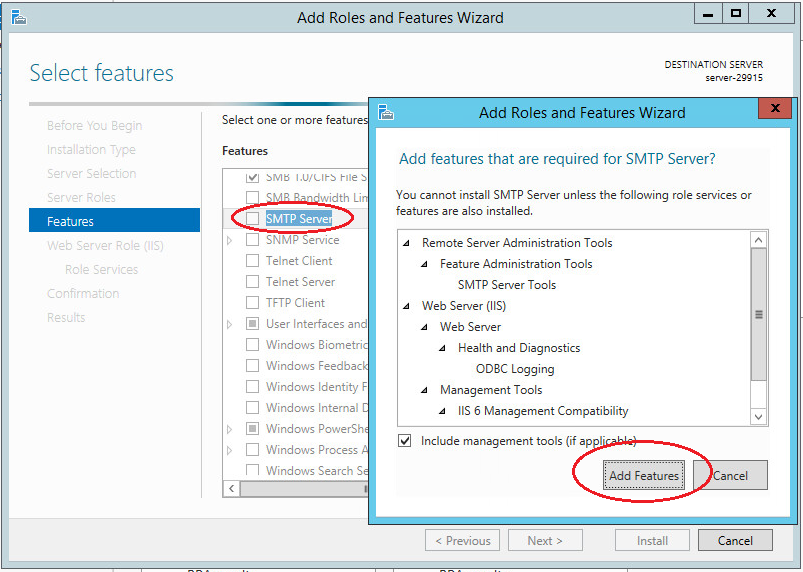
In the following steps, accept the default settings and complete the installation. Server reboot is not required.
SMTP server setup
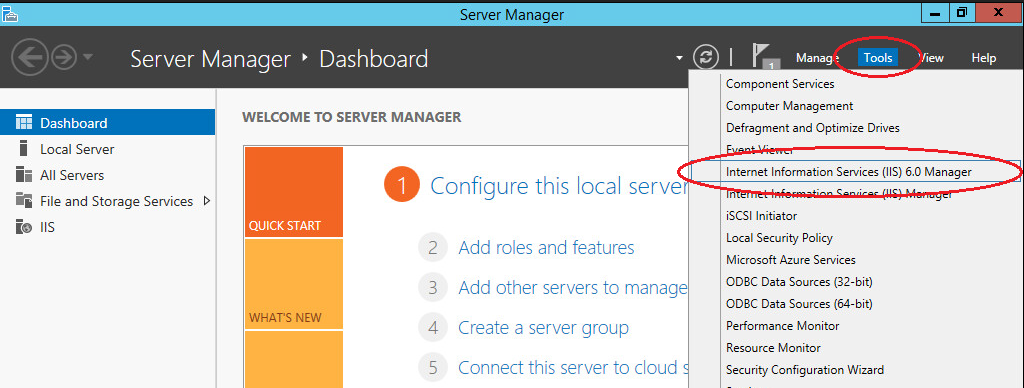
You can manage your SMTP server through Internet Information Services (IIS) Manager 6. To open IIS, go to Server Manager and in the menu in the upper right corner select “Tools” -> “IIS 6.0 Manager”.
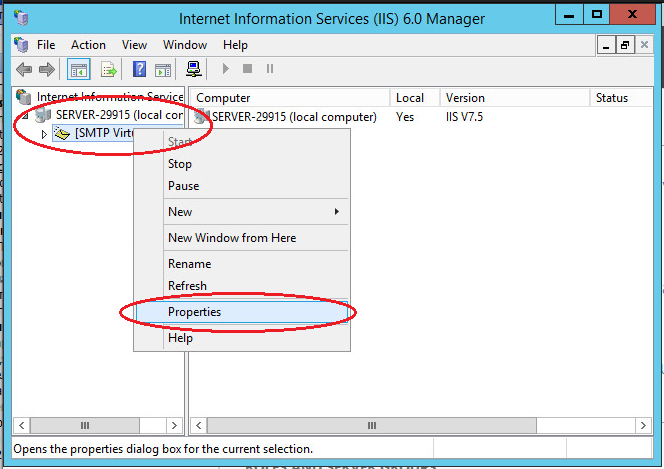
Expand the branch with the server name, select SMTP Virtual Server and open its properties.
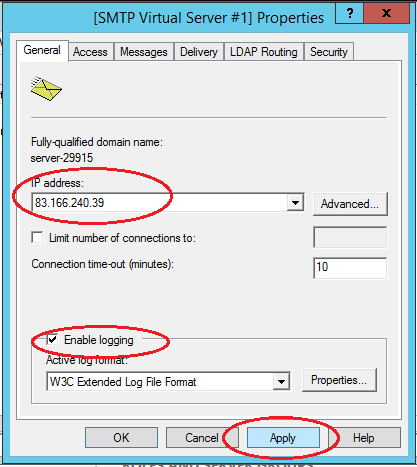
On the “General” tab, select your IP address on which the SMTP server should respond and enable logging to save information about all sent emails.
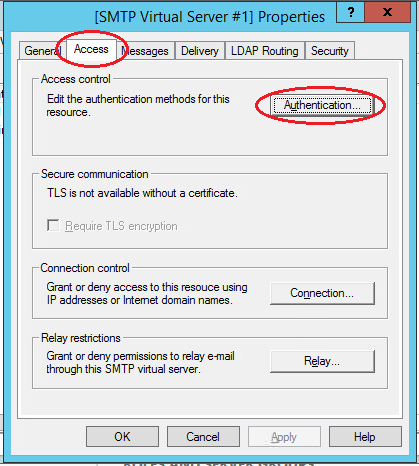
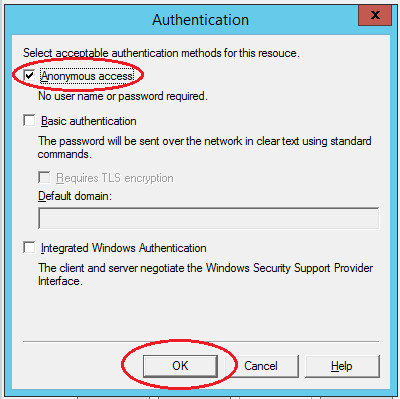
On the “Access” tab in the “Access Control” section, click the “Authentication” button. In the window that opens, check the box “Anonymous access” so that all users of the server and applications can use the SMTP server.
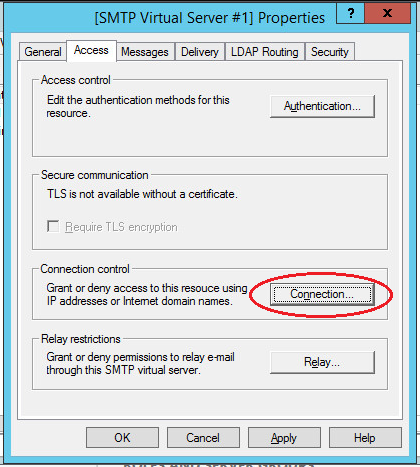
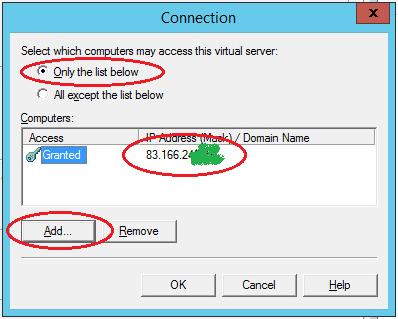
Next in the “Connection Control” section, click the “Connection” button. In the window that opens, allow access to the SMTP server to only certain computers by adding them to the list and selecting the connection type “Only computers from the list below”.
Note: do not forget to add the IP address of the server on which the SMTP server is configured.
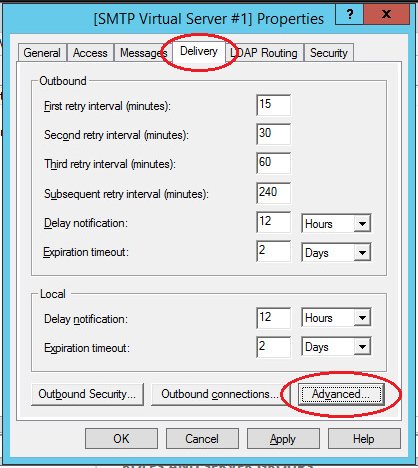
Next, on the “Delivery” tab, click the “Advanced” button. In the window that opens, in the “Fully Qualified Domain Name” field, enter your domain name or IP address.
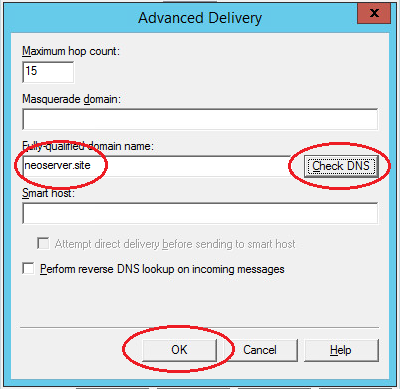
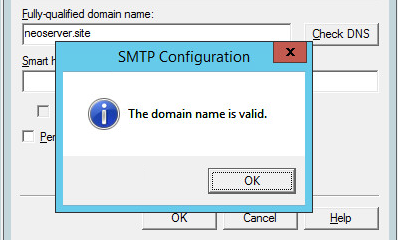
When checking DNS, the domain name must be valid.
Save all made changes.
SMTPSVC autorun service
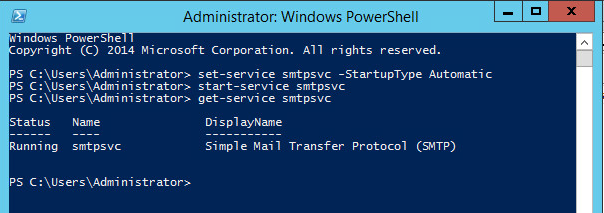
The SMTP server service should start automatically when the server is turned on. To do this, open a command bar and run the following commands:
Start the service;Verify that the SMTPSVC service is running:
SMTP server testing
To check the correctness of the work, create any text document with the txt extension (for example, on the desktop), and enter the following lines, specifying from whom you are sending the letter and to whom:
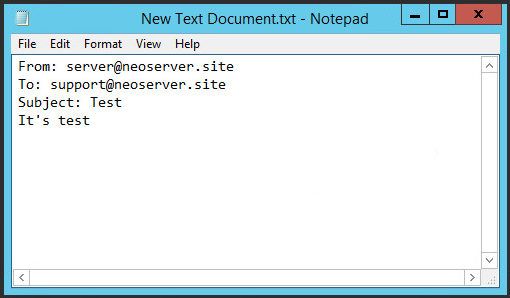
Notes:
- in the mailing address of the sender, specify your domain or ip-address as the domain name, the mailbox name can be any;
- Sent emails get spammed; to prevent this from happening you need to configure SPF and / or DKIM for your domain.
Next, transfer the created file to the C: \ inetpub \ mailroot \ Pickup directory. The file will disappear after a short time. Check the received email.
